How to install your theme on Shopify
About five minutes, no code. Your live store stays exactly as it is until you choose to publish.
Before you start
- Download your theme from the link on your download page. It is a .zip file. Do not unzip it. Shopify needs the zip as it is.
- Bought All-Access? Unzip All 40 themes once. Inside are 40 separate theme zips: upload whichever you want, the same way.
- Your products, orders, customers and pages are not affected by installing a theme. A theme only changes how your store looks.
Step 1: Open your themes
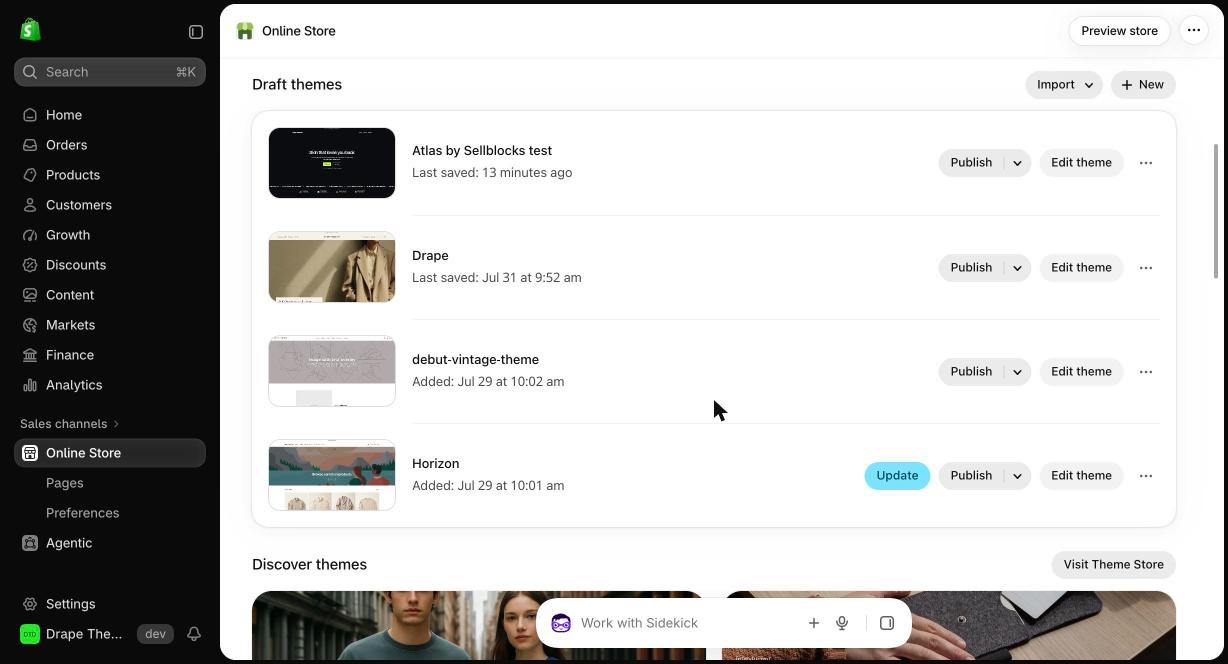
In Shopify admin, click Online Store in the left menu. You land on your themes. Scroll down to Draft themes.
Step 2: Import the zip
Next to Draft themes, click Import, then Upload zip file.
Step 3: Upload
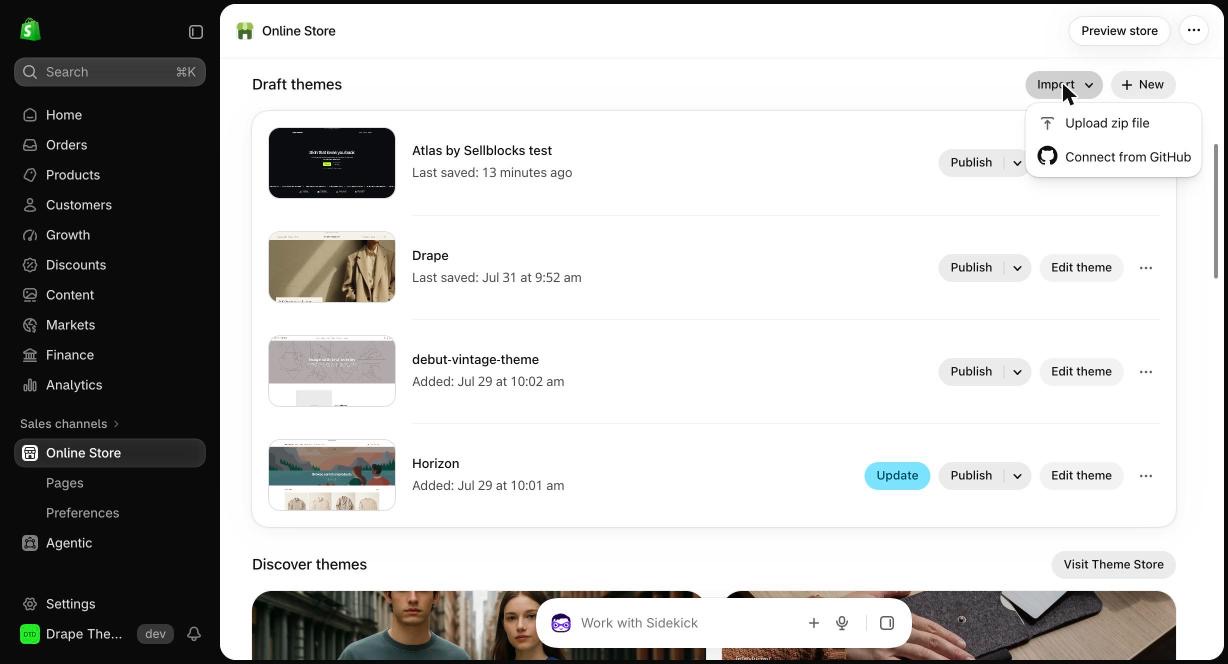
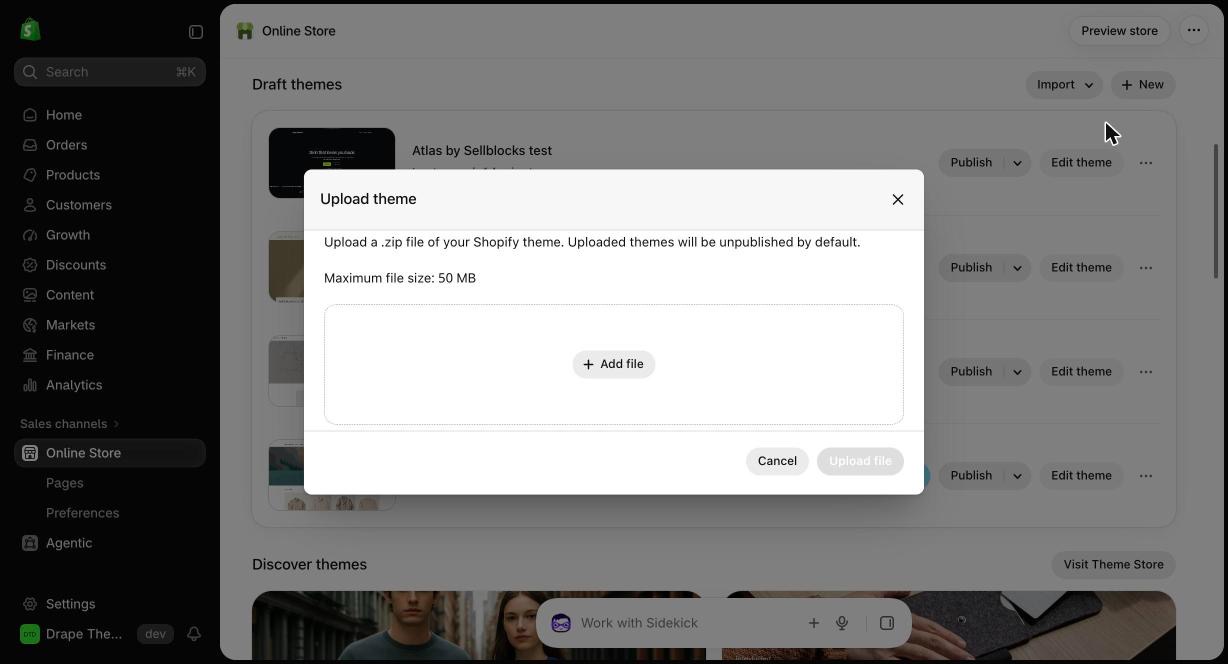
Click Add file, choose your Sellblocks theme zip, then click Upload file. It takes a few seconds.
Step 4: Make it yours
Your theme appears in Draft themes. Click Edit theme to open the theme editor.
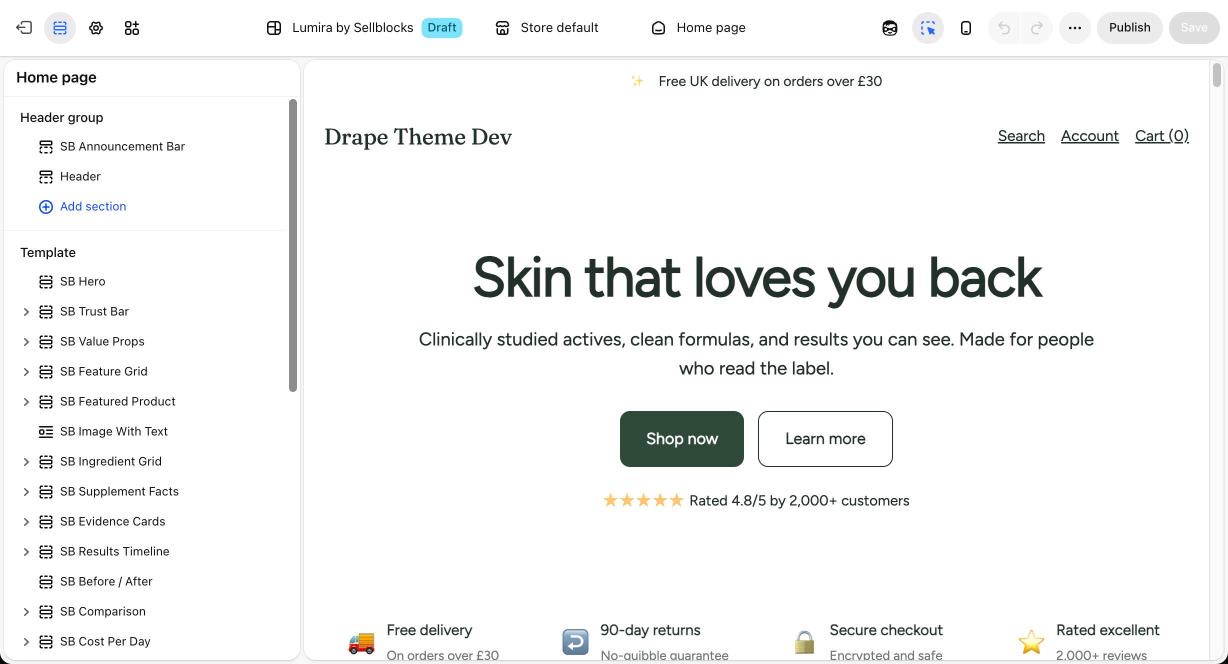
- Edit any section: click it in the left panel to change text, images, colors and buttons.
- Add, remove or reorder: use Add section, the eye icon to hide one, or drag to reorder. Every section in your theme is available under Add section, including ones not on the homepage yet.
- Your brand: the gear icon (Theme settings) sets your colors, fonts and page width. Add your logo and menu in the Header section.
- Product pages: use the page picker at the top of the editor to switch to a product template.
- Prefer code? From the theme's … menu choose Edit code. Every section is plain, readable Liquid you can change freely.
Demo photos and copy on our preview pages are examples and are not included. Add your own images in each section; until you do, sections show a neutral placeholder.
Step 5: Publish when ready
Click Save, preview it, and when you are happy click Publish (top right of the editor). Your previous theme stays in Draft themes, so you can switch back at any time.
Adding single sections (All-Access)
The All-Access sections pack drops into any Online Store 2.0 theme, including the one you already use:
- Unzip the sections pack.
- In Online Store, on the theme you want, open … › Edit code.
- Under sections, click Add a new section, give it the same name as the file (for example
sb-faq), replace the starter code with the file's contents, and save. - Back in the theme editor, click Add section. It is listed there, ready to use.
If something goes wrong
- "Invalid theme" or a missing file error: you probably uploaded an unzipped folder or re-zipped it. Upload the original zip you downloaded.
- Theme limit reached: Shopify allows 20 themes per store. Delete a draft theme you no longer need, then import again.
- Lost your download link? Email [email protected] with the email you paid with and we will send it straight back.
Still stuck? Contact us. We reply within 2 working days, and if a theme will not install correctly we fix it or refund you.